How to Create an Event or Offer Appointments
First, Register as a vendor on the site
Create an Event
Offer appointments on your listing
- Register as a vendor on the site
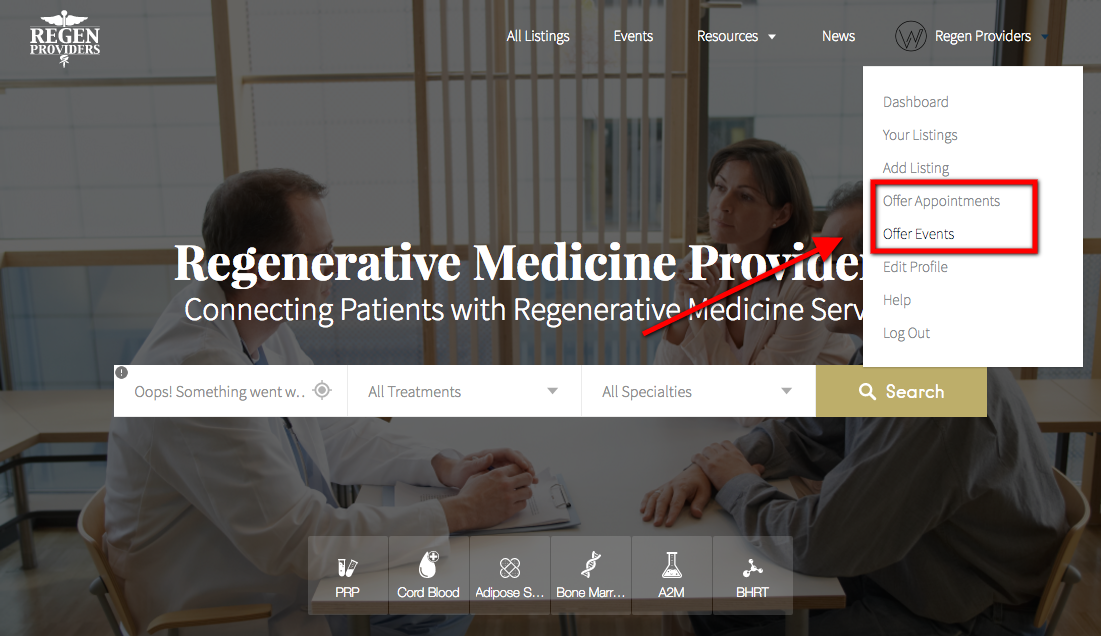
- Under your Account, click on offer events/appointments.
- Fill out the form.
- Once we approve your application (usually within 24 hours) you have officially become a vendor—someone that can create events or appointments. It’s that easy!
- Create an Event
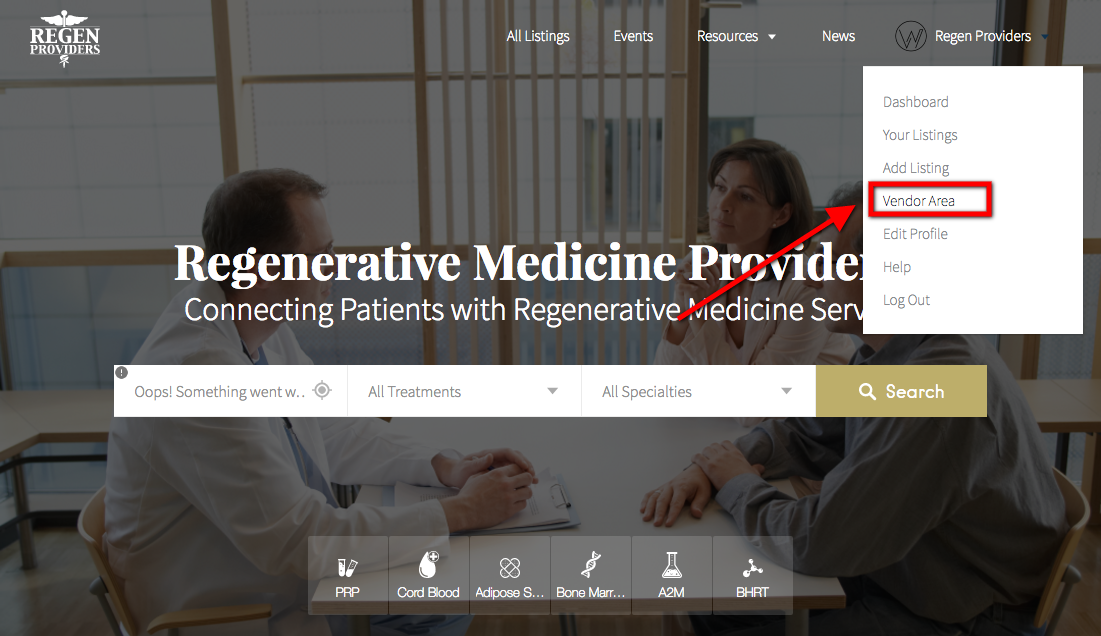
- Under your Account, click on Vendor Area.
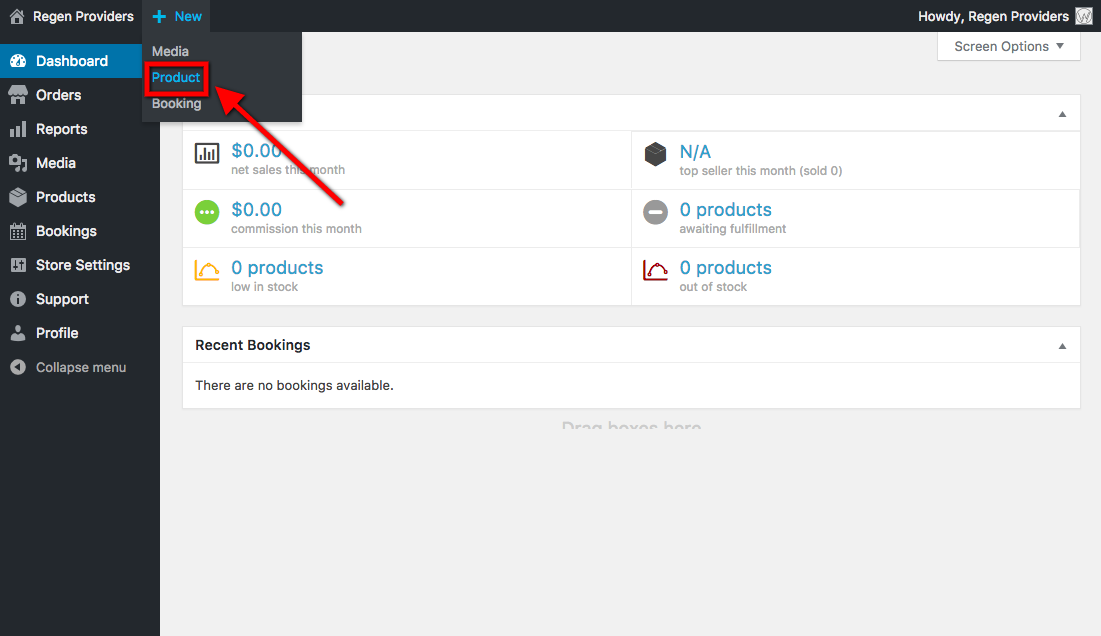
- At top, hover over +New and click Product.
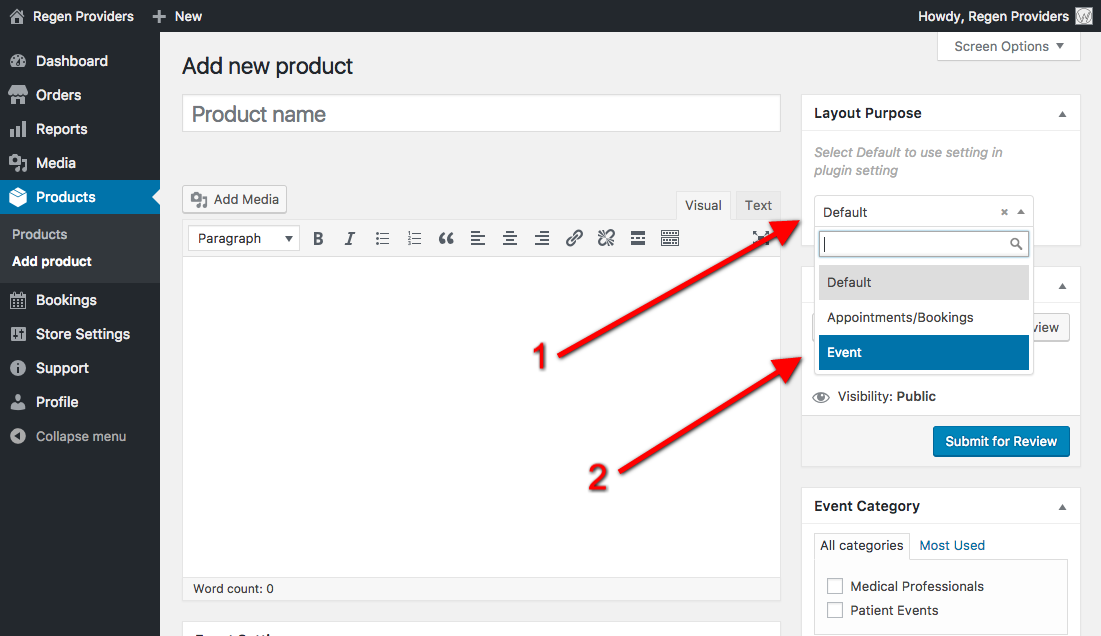
- In the top right box titled “Layout Purpose,” select “Event.”
- Enter in the title of your event. Something that describes it succinctly in a few words, e.g. “Patient Education Conference on Regenerative Medicine”.
- Enter a description. Put all the relative info for your event here. Be as descriptive as you want! This info wont be on your listing page, but it will appear under your event when people search for it on our main events page.
- Enter a Price.
- Enter the number of tickets available for your event.
- Enter a short description that will appear directly on your listing. Include the date, a brief description of it, and the general location.
- Set an image for your conference. Have any eye catching media for your event? Put it here!
- Then hit “Submit for Review.” That’s it! You’re done!
- Offer Appointments On Your Listing
- First, make sure you have registered with our site as a vendor.
- Under your Account, click on Vendor Area.
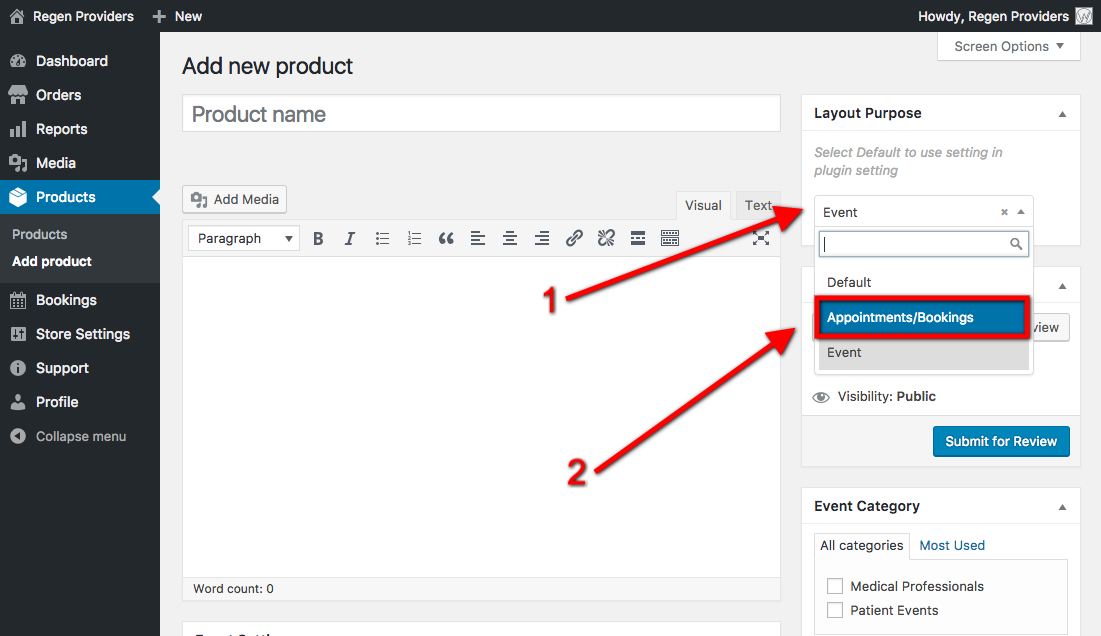
- At top, hover over +New and click Product.
- In the top right box, titled ‘Layout Purpose’ select Appointments/Bookings.
- Enter a title for your appointment. Something that describes it succinctly in a few words, e.g. “Consultation With Dr. Jones”.
- Enter a description. Put all the relative info for your appointment here. Be as descriptive as you want! This info wont be on your listing page, but it will appear under your event when people search for it on our main events page.
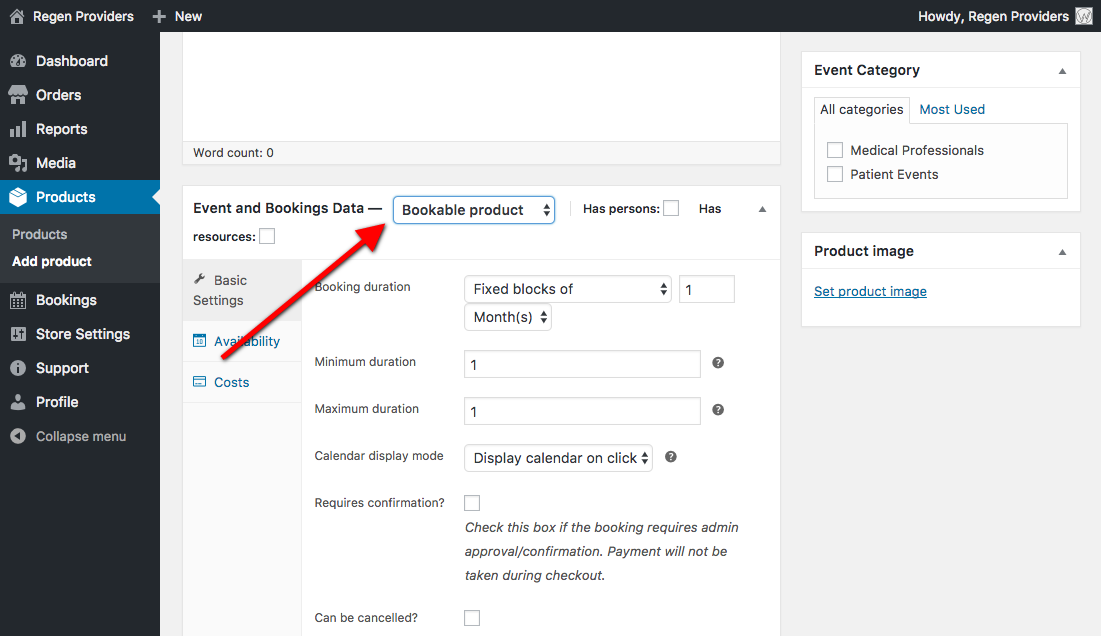
- In the box, ‘Event and Bookings Data’, select ‘Bookable product’ from the drop down.
- For Booking duration, select the length of your appointment. E.g. if it is 1 hour long, select ‘fixed blocks of’, enter ‘1’ into the empty box next to that, and finally select ‘hour(s)’ in the next dropdown menu.
- Select the minimum time a person can book. Usually, this is 1, unless for example, a person can book back to back appointments to make a lengthier one.
- Chose your options for the next three settings.
- Click Availability to change tabs to the next set of settings.
- Select the maximum allowed bookings for each time slot “—‘Max bookings per block’.
- For example, if you have just one doctor on duty to take an appointment, then simply enter 1. However, if for example there are 3 doctors on duty then enter 3.
- Enter in how far in advance you want people to be able to book with you.
- You can select if you desire a buffer period between appointments.
- Set the ‘All dates are…’ setting to ‘not-available by default’.
- This will make the next step easier.
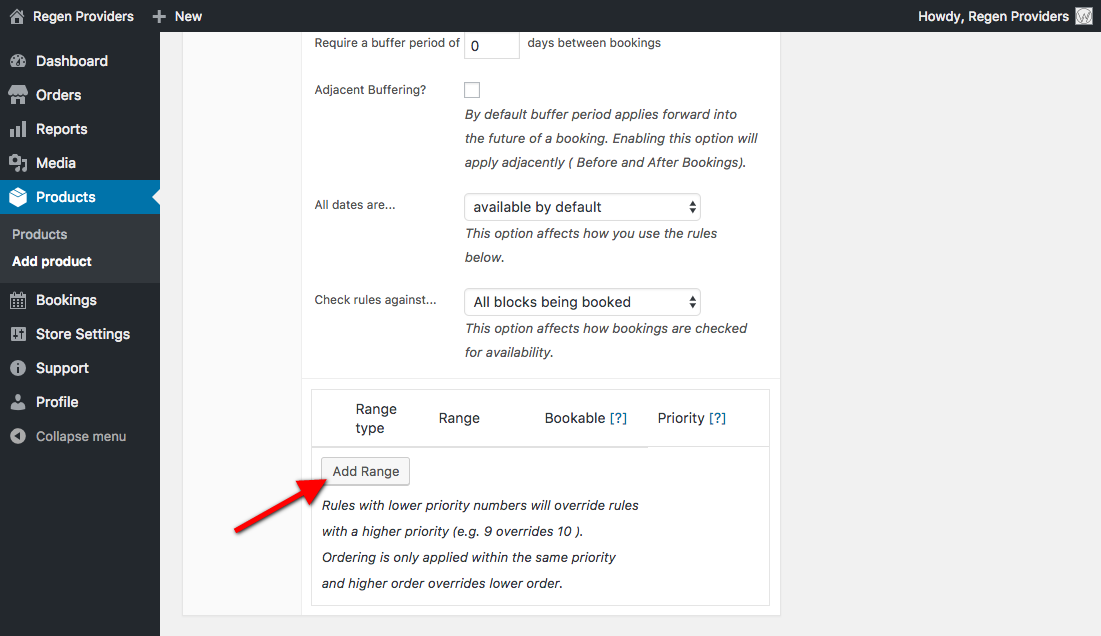
- In the range type box, click Add Range.
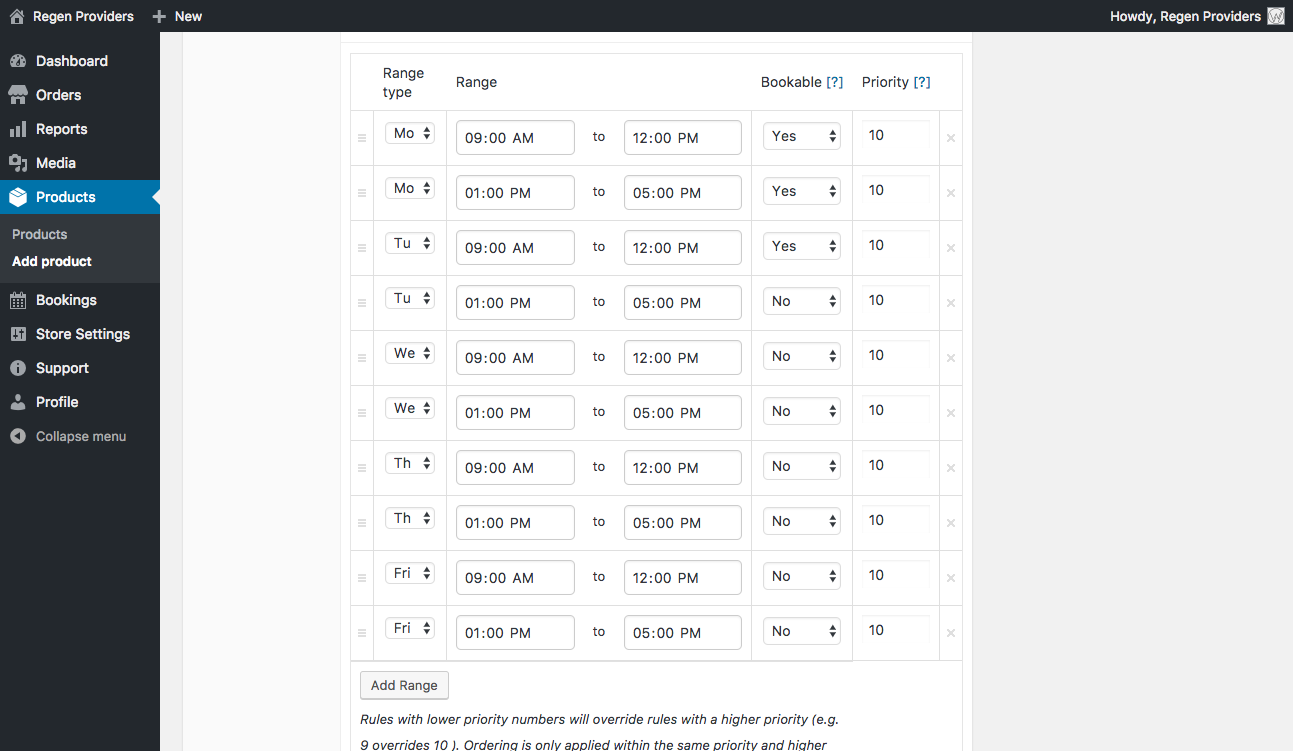
- For most providers, choosing a day of the week will be best.
- Once that is selected, then a time range can be selected.
- This way, you can control appointment hours for every day easier.
- Repeat these steps with the range table to fully flesh out your appointment schedule. For example, the below schedule would allow appointments to be booked between 9:00 AM and 5:00 PM, with a one hour blocked off period between 12:00 PM and 1:00 PM.
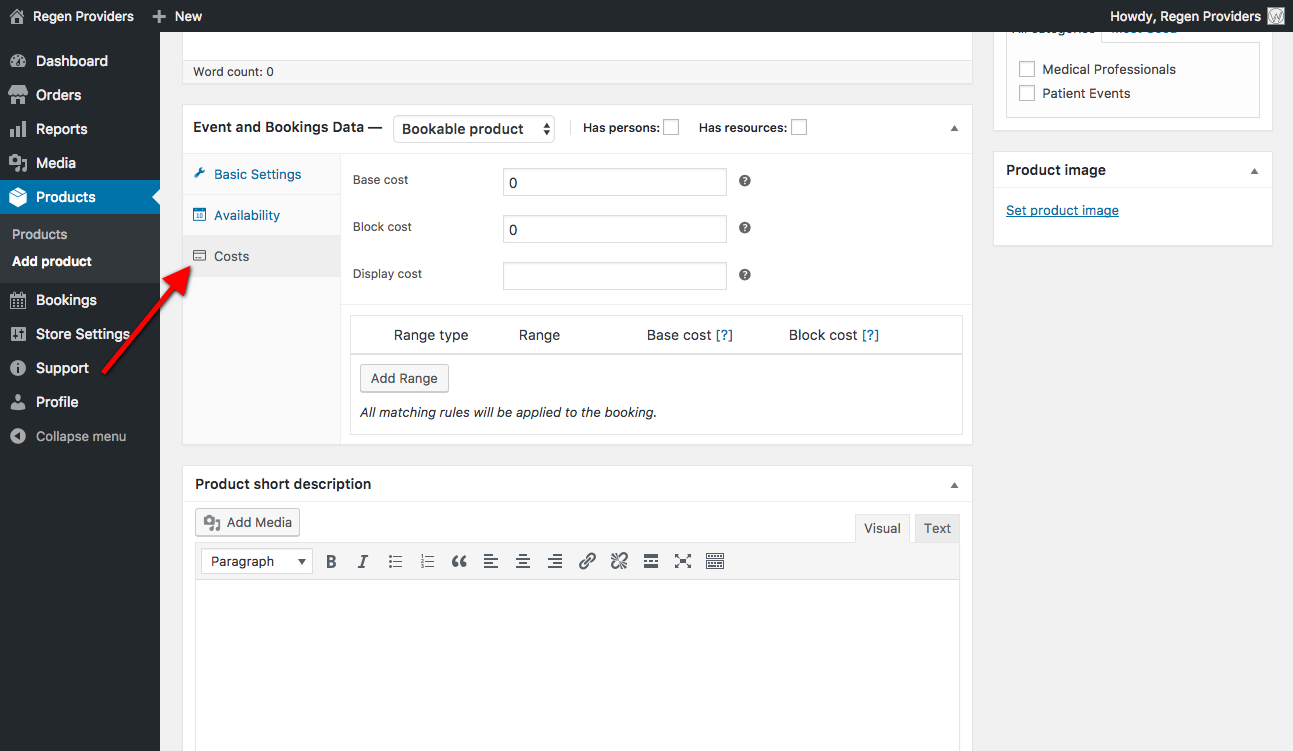
- Under the Costs tab, enter in a fee, or 0 for it to be displayed as free.
- Enter a short description if you desire.
- Enter an image.
- Scroll back up to Submit for Review.
- All done!


If you make any mistakes or have to ever update this information at anytime, everything is editable from your vendor admin area.
As always, if you have any technical questions or problems, click on the support button on the bottom left of your admin page or drop us a line!